I'll admit that my interest in writing articles about the repair and restoration of these old pencils is not entirely altruistic. More often than not, my mission isn't so much to educate mankind in the care and feeding of these little beasts . . . it's so that later I can remember how I did it, too.
The lowly Wearever brand, produced by David Kahn, Inc., doesn't get as much love as it should. Kahn was a real visionary in writing instruments who found ways to make pens and pencils that mimicked the look of higher priced brands, but more cheaply and efficiently. They remain plentiful today, and since it takes a lot to knock one of these out of commission, the fact that almost all of them still work today means that there hasn't really been much call for me to dive into repairing one.
Until Loyal Knight Harry Shubin asked if I could take a shot at this one:
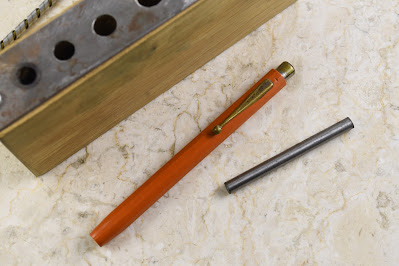
Wearever Deluxe pencils are not too terrible, and the sample engraving on the side of this one makes it better and, Harry and I agreed, worth taking a shot at getting it to work again. The Wearever Deluxe was a rear drive pencil that advanced and retracted the lead by turning the top, a feature typically found on more expensive pencils, but in the case of this one the entire top was missing:
I happened to have a suitable donor lounging around in one of my bins. It was missing the cap (or more likely, as often as the caps go missing, it already gave its cap up to complete another one in my collection), so it was just waiting for the opportunity to give its last full measure of service:
Tug as I might, I couldn't get the damned bushing out of the top so, rather than risk crushing it using pliers, I decided to attack from the other end. After wrapping a rubber band around it and twisting without any progress, I twisted the other way . . . yep, it is reverse threaded (tuck that one away for future reference):
I figured that spiral mechanism was all that held the upper bushing in place. I figured wrong. Time to bring out the big guns . . .
That's a knockout block for getting feeds and nibs out of their sections, which I've used more times than I can count in circumstances like these. I had to put two of those rods into the barrel in order to reach the bushing, then a couple sharp whacks got the job done.
The reason it was so stubborn was that there is a groove in the barrel of the orange one into which the bushing seats. That was probably added later in production:
The bushing engages the mechanism with the help of 2 little bumps protruding near the top of the spiral:
I inserted the bushing into the top of Harry's pencil, and like magic, the pencil worked perfectly. The only issue was that the bushing pulled out easily, so I used a pair of flat pliers to squeeze the end of the bushing slightly out of round -- just like I do to give cracked Parker drive tubes enough "grab" to work without soldering.
Now about that missing cap . . . there were a few different variations of these caps, but I have a pretty good idea what they looked like:
I heard a story about these caps once, about how they were repurposed tire valve caps from military Jeeps. Hogwash, I say. Although I do have one that has an actual tire valve cap, it looks terrible and obviously out of place. Besides, the insides of these caps aren't threaded.
So Harry, you owe me a cap:


No comments:
Post a Comment